DIY Paper Plate Confetti Snowglobe Shakers
A fun, festive project!
DIY Paper Plate Confetti Snowglobe Shakers
Get in the holiday spirit with adorable paper plate snowglobes! They're a project fun for all ages, and versatile enough to customize to any theme or style.

DIY Paper Plate Confetti Snowglobe Shakers
You will need:
Paper plates in the style/size of your choice
Clear plastic plates (sized smaller than your paper plates)
Paper cutouts, embellishments, stickers, markers, photos, etc. (whatever you want to showcase inside your globe!)
Hot glue and/or Mod Podge
Pretty paper (for the snowglobe base)


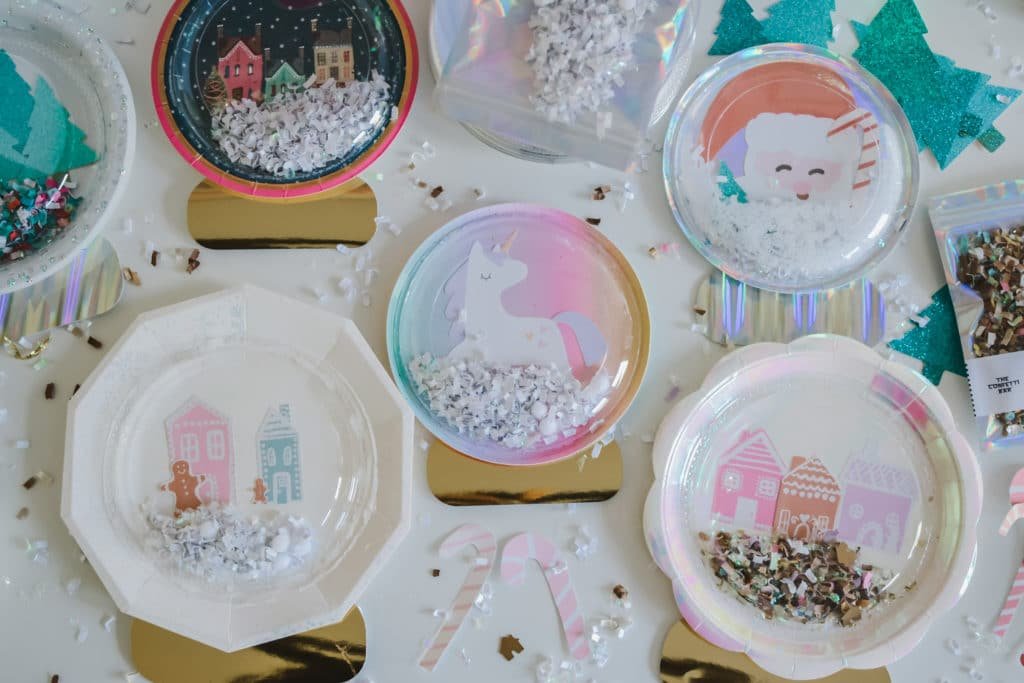
I started by gathering up some adorable paper plates from Ellie & Piper. (I got Frosted Snowflake Large Paper Plates, Iridescent Silver Small Paper Plates, Iridescent Scallop Edge Large Paper Plates, and Rainbow Ombré Small Paper Plates.)
I also had some clearance plates I had previously gotten at Pier 1, plus some from Target.
(If you're looking for other options, these iridescent ones from Amazon* would also be great. Or these rainbow ones*. Or these snowflake ones*.)
For the clear plates, I used 6" clear plastic plates*& 7" clear plastic plates* as they fit my paper plate styles best. You may need to go bigger, depending on the size of your paper plates.


I then embellished each plate with some cute cutouts — just glue them onto the plates.
The trees I cut on my own cutting machine, but the gingerbread houses, unicorn, santa, and candy canes I got from an assortment of Olive & Eve Co.'s printables. I printed them on my home printer (on shimmery white paper!), then cut them out with a pair of scissors. (For some of the designs I scaled the PDF page smaller so the images would fit inside my plates.)

DIY Paper Plate Confetti Snowglobe Shakers

DIY Paper Plate Confetti Snowglobe Shakers

DIY Paper Plate Confetti Snowglobe Shakers

DIY Paper Plate Confetti Snowglobe Shakers
Once the embellishments are dry it's time for the best part — adding the confetti! You don't need a lot as you only want it to fill the bottom of the snowglobe so you can still see your background! For the mixes, I used Snowball Fight & Gingerbread House, but any mix you like from the shop will work. (Or perhaps even custom confetti if you need something specific to match!)
Add a small amount of confetti to the center of your plate, then add glue along the outside edge of your clear plate. Press the clear plate face down over your embellished paper plate. (I used hot glue so it would dry quick, but you have to a.) work quickly and b.) be VERY careful. If you're doing this project with kids, or just want to be able to take your time, I suggest using Mod Podge or another slow drying glue. You'll just have to be patient to wait for it to dry.)

DIY Paper Plate Confetti Snowglobe Shakers

DIY Paper Plate Confetti Snowglobe Shakers
For the base, simply cut out an oblong shape to your desired size and glue it on the back of the plate. You can have fun with different shapes!

DIY Paper Plate Confetti Snowglobe Shakers
If you want to get a little extra festive, you can "frost" part of the clear plate by mixing Epsom Salt with glitter, then adding it to the plate with Mod Podge.

DIY Paper Plate Confetti Snowglobe Shakers

DIY Paper Plate Confetti Snowglobe Shakers
I love how these came out so much I'm now dreaming up all sorts of variations. How cute would these be with photos inside? (They'd make great gifts!)
I can also see doing different themes/holidays...um, hello Valentine's Day loveglobes! ♥︎
These are so addicting to make I bet you can't stop at just a few. Be sure to stock up on confetti! ;)